Getting a smooth, even finish with an HVLP paint sprayer starts long before you pull the trigger. One of the most important steps is preparing your paint to the right consistency.
Paint that's too thick may cause sputtering, uneven coverage, or a rough finish. Paint that's too thin can lead to drips, runs, and poor coverage. Finding the right balance helps your sprayer deliver a more consistent spray pattern.
But how much should you thin paint for an HVLP sprayer? And how do you know when the viscosity is right?
The answer depends on the paint you're using, your sprayer's capabilities, and the manufacturer's recommendations. This guide explains how to measure paint viscosity, thin different types of paint, and avoid common mistakes.
Whether you're refinishing furniture or updating cabinets, proper paint preparation can make your next project easier. You can also explore Tilswall's DIY paint sprayers to find a suitable tool for your home improvement projects.
What Is Paint Viscosity and Why Does It Matter?
Paint viscosity describes how easily paint flows. Thick paint has higher viscosity, while thinner paint flows more freely.
HVLP stands for High Volume, Low Pressure. These sprayers use a high volume of air at relatively low pressure to atomize paint into small droplets.
For an HVLP sprayer to work properly, the coating must be compatible with the sprayer's airflow, nozzle, and fluid delivery system.
What Happens When Paint Is Too Thick?
Paint with excessive viscosity can be difficult to atomize, leading to:
-
Uneven or interrupted spray patterns
-
Sputtering or spitting from the nozzle
-
Large paint droplets
-
Rough or textured finishes
-
Reduced paint flow
What Happens When Paint Is Too Thin?
Over-thinning can create different problems:
-
Paint runs and drips
-
Reduced hiding power
-
More coats needed for coverage
-
Uneven film thickness
-
Potential changes to coating durability
The goal isn't to make paint as thin as possible. It's to achieve a consistency that works with your sprayer while staying within the coating manufacturer's specifications.
Do You Always Need to Thin Paint for an HVLP Sprayer?
No. Not every paint requires thinning.
Some stains, clear finishes, and spray-ready coatings can be used directly from the container. Thicker products, such as certain latex paints and primers, may need adjustment—or may not be suitable for a particular HVLP sprayer.
Before adding any thinner, check three things:
- Paint instructions: Does the manufacturer permit thinning, and what is the maximum recommended amount?
- Sprayer specifications: What viscosity range and coating types does your HVLP sprayer support?
- Nozzle compatibility: Is the installed nozzle suitable for the coating?
A common mistake is assuming that every paint sprayer requires the same dilution ratio.
For example, a coating that works well in one HVLP sprayer may be too thick for a smaller model. Similarly, a paint designed for brush or roller application may require a different preparation process.
Start by testing the paint without thinning whenever the coating and sprayer manufacturers permit it. Only adjust the consistency if necessary.
How to Measure Paint Viscosity with a Viscosity Cup
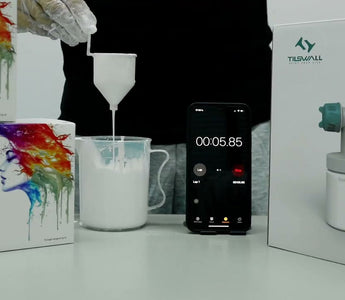
A viscosity cup is a simple tool for checking how quickly paint flows.
It has a small opening at the bottom. When filled with paint, the liquid drains through the opening, and the drainage time provides an indication of viscosity.
This measurement is often expressed in seconds.
How to Use a Paint Viscosity Cup
Step 1: Stir the paint thoroughly.
Mix the paint until its consistency is uniform. Pigments and other ingredients may settle during storage.
Step 2: Prepare the viscosity cup.
Make sure the cup is clean and dry. Use the cup type specified by your sprayer manufacturer.
Step 3: Fill the cup with paint.
Follow the cup manufacturer's instructions. Some cups are submerged in the paint, while others are filled with the outlet temporarily blocked.
Step 4: Measure the flow time.
Allow the paint to drain and start timing according to the cup's procedure. Stop the timer at the specified endpoint, such as when the continuous stream first breaks.
Step 5: Compare the reading.
Check the measured time against your HVLP sprayer's recommended viscosity range.
If the paint is too thick and thinning is permitted, adjust it gradually and repeat the test.
What Is the Right Viscosity for HVLP Spraying?
There is no universal viscosity measurement that works for every HVLP sprayer.
Different manufacturers use different cup types, including DIN, Ford, and Zahn cups. A reading of 30 seconds with one cup does not necessarily equal 30 seconds with another.
Temperature also affects viscosity, so measurements are most useful when taken under reasonably consistent conditions.
The correct target is the one specified for your coating, sprayer, and viscosity cup—not a generic number found online.
How to Thin Paint for an HVLP Sprayer: Step-by-Step
Once you've checked the coating instructions and measured its viscosity, you can prepare the paint for spraying.
Step 1: Gather Your Materials
Prepare the following:
- Paint suitable for your HVLP sprayer
- Manufacturer-approved thinner, if needed
- Clean mixing container
- Stirring stick
- Measuring cup
- Compatible viscosity cup
- Paint strainer
- Scrap cardboard or test surface
- Appropriate gloves, eye protection, and respiratory protection
Work in a properly ventilated area and follow the coating's safety data sheet. Do not use flammable solvents in a sprayer unless the equipment manufacturer explicitly permits them.
Step 2: Check the Original Paint Consistency
Stir the paint and measure its viscosity before adding anything.
Record the initial flow time, especially if you're preparing paint for a larger project.
This gives you a baseline and helps prevent unnecessary thinning.
Step 3: Choose the Correct Thinner
The appropriate thinner depends on the coating formulation.
For water-based paints, the manufacturer may permit adding clean water.
Oil-based paints may require a specified solvent, but not every HVLP sprayer is designed for solvent-based coatings.
Never substitute water for solvent or use an unapproved thinner simply because it's available.
Step 4: Add Thinner Gradually
Pour a measured amount of paint into a separate mixing container.
Add a small amount of approved thinner, staying within the coating manufacturer's maximum dilution allowance.
Stir thoroughly and avoid making several adjustments at once.
Keep a record of how much thinner you add so you can reproduce a successful mixture later.
Step 5: Retest the Viscosity
Use the viscosity cup to measure the adjusted paint.
If the reading is still outside the recommended range, review the instructions before making another small adjustment.
Don't continue thinning beyond the manufacturer's permitted limit just to reach a particular number of seconds.
If the coating remains too thick, you may need a different nozzle, a more capable sprayer, or a different coating.
Step 6: Strain the Paint
Before filling the spray gun, pour the prepared paint through a compatible paint strainer.
This helps remove dried particles, lumps, and other debris that could obstruct the nozzle.
Step 7: Perform a Test Spray
Test the prepared paint on cardboard or scrap material before spraying your project.
Look for a consistent spray pattern with good atomization and no excessive dripping.
If the result is uneven, check the nozzle, airflow, and material flow settings before adding more thinner.
For a complete introduction to sprayer setup and application, see Tilswall's How to Use a Paint Sprayer: Beginner's Guide.
How to Thin Different Types of Paint for HVLP Sprayers
Different coatings behave differently during spraying. Understanding their properties helps you avoid unnecessary dilution.
| Paint Type | Thinning Approach | Key Consideration |
|---|---|---|
| Latex Paint | May require adjustment | Often relatively thick |
| Water-Based Paint | Water if manufacturer-approved | Avoid over-thinning |
| Oil-Based Paint | Specified compatible thinner | Check sprayer and solvent safety |
| Primer | Depends on formulation | Some primers are too thick for certain HVLP units |
| Wood Stain | Often spray-ready | Check manufacturer instructions |
| Enamel Paint | Depends on formulation | Maintain proper film thickness |
How to Thin Latex Paint for an HVLP Sprayer
Latex paint is commonly used for walls, furniture, and home improvement projects. However, many latex coatings are relatively thick.
Start by checking whether your HVLP sprayer can handle the specific paint.
If the manufacturer permits thinning, add the recommended amount of clean water gradually, stir thoroughly, and test the viscosity.
Avoid assuming that a fixed percentage of water will work for every latex paint.
Some modern latex products are formulated for specific application methods and may not perform well when excessively diluted.
How to Thin Water-Based Paint
Water-based coatings are often convenient for DIY projects because many allow water cleanup.
However, being water-based doesn't automatically mean the product can be diluted without limits.
Check the paint label, add water only when permitted, and test the consistency before spraying.
Too much water may reduce coverage or interfere with the coating's intended performance.
How to Thin Oil-Based Paint
Oil-based paints and enamels may require manufacturer-approved solvents rather than water.
Before preparing these products, verify that both the sprayer and its electrical components are suitable for the coating's solvent and flammability characteristics.
Follow the paint manufacturer's thinning, ventilation, and protective equipment requirements.
If compatibility is unclear, do not spray the material with that equipment.
Should You Thin Primer or Wood Stain?
Some wood stains are thin enough to spray without additional preparation. Others may require adjustment.
Primers vary significantly. Certain high-build primers are too thick for lightweight HVLP equipment, even when thinning is allowed.
Always check the specific coating rather than relying on its general category.
Common Paint Thinning Problems and How to Fix Them
Even when you've measured viscosity, the first test spray may not produce the finish you want.
Fortunately, several common problems can be addressed by reviewing your paint preparation and equipment settings.
| Problem | Possible Cause | What to Check |
|---|---|---|
| Paint spitting | High viscosity, blockage, or air entering the fluid path | Viscosity, nozzle, seals |
| Runs and drips | Excessive application or over-thinning | Material flow, coating thickness |
| Uneven spray pattern | Nozzle obstruction or unsuitable settings | Nozzle, airflow, paint preparation |
| Rough finish | Poor atomization or drying conditions | Viscosity, distance, environment |
| Weak coverage | Over-thinning or insufficient film build | Dilution amount, coating instructions |
Mistake 1: Adding Too Much Thinner
Adding excessive thinner can reduce coverage and cause running.
Measure each addition and stay within the manufacturer's limits.
Mistake 2: Ignoring Nozzle Size
A nozzle that's too small for the coating can restrict paint flow and contribute to poor atomization.
Before thinning further, check whether another approved nozzle is more appropriate.
Mistake 3: Skipping the Test Spray
A paint mixture may appear correct in the cup but behave differently when sprayed.
Always test it before coating the final surface.
Mistake 4: Using Dirty Equipment
Dried paint inside the nozzle or fluid passage can affect spraying even when the viscosity is correct.
Keeping the equipment clean helps maintain consistent performance. After finishing your project, follow the steps in Tilswall's guide to cleaning an electric paint spray gun.
Tips for Getting a Smooth Finish with an HVLP Sprayer
Correct viscosity is only one part of achieving a smooth sprayed finish.
For better results:
-
Choose a nozzle that matches the coating and project.
-
Maintain a consistent distance from the surface.
-
Keep the spray gun moving during application.
-
Use controlled, overlapping passes.
-
Apply coats according to the paint manufacturer's instructions.
-
Allow the recommended drying and recoating time.
-
Avoid spraying in unsuitable temperature, humidity, or ventilation conditions.
If you notice an uneven pattern, don't immediately add more thinner. First check the spray settings, nozzle condition, and application technique.
Choosing an HVLP Sprayer for Different Paint Viscosities
Not all HVLP paint sprayers handle the same materials.
When comparing equipment, pay attention to the supported viscosity range, available nozzle sizes, airflow, and compatible coatings.
For example, a lightweight sprayer may be suitable for certain furniture finishes and stains, while thicker coatings may require different equipment.
Tilswall offers several electric and cordless models designed for home improvement projects. You can compare the options in the Tilswall DIY Paint Sprayers collection.
Before choosing a model, review its specifications to confirm that it supports the paint you plan to use.
Frequently Asked Questions
Can I use water to thin paint for an HVLP sprayer?
Yes, but only if the coating manufacturer permits water thinning. Many water-based paints can be adjusted with clean water, while solvent-based products require different treatment.
How do I know if paint is too thick for my spray gun?
Signs may include sputtering, reduced material flow, large droplets, and uneven atomization. A compatible viscosity cup can help confirm whether the paint falls within your sprayer's recommended range.
Can I use latex paint in an HVLP sprayer?
Some HVLP sprayers can handle compatible latex coatings. However, thicker latex paints may require equipment with greater material-handling capability. Always check the paint and sprayer specifications.
What happens if I add too much thinner?
Excessive thinning may cause runs, poor coverage, reduced film thickness, and coating performance problems.
What viscosity should paint be for an HVLP sprayer?
There is no single ideal viscosity for all HVLP sprayers. Use the range recommended for your specific sprayer, coating, and viscosity cup.
Can I thin paint directly in the spray gun container?
Some manufacturers permit mixing in the paint container, but a separate mixing vessel generally makes it easier to measure, stir, and strain the coating before filling the sprayer.
Conclusion: Get the Paint Consistency Right Before You Spray
Learning how to thin paint for an HVLP sprayer is about understanding your coating, measuring its viscosity, and making careful adjustments—not simply adding more water or thinner.
Start with the paint manufacturer's instructions, test the original consistency, and make small changes only when necessary. A viscosity cup and a test spray can help you achieve more consistent results while avoiding common problems such as sputtering and drips.
With properly prepared paint, suitable equipment, and good spraying technique, your DIY painting projects can be more manageable and produce a smoother, more even finish.