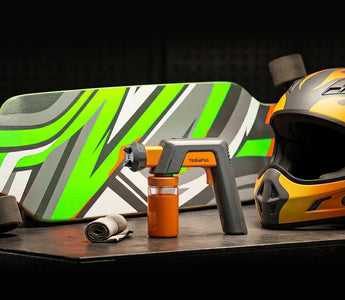
A skateboard is more than just a piece of sports equipment. For many riders, artists, and DIY creators, it is a blank canvas for personal expression.
Whether you want to restore an old skateboard deck, change its color, or create an entirely unique design, repainting a skateboard is an affordable way to customize your gear.
The best way to paint a skateboard depends on the finish you would like to achieve. While spray paint cans are commonly used, a cordless paint sprayer can provide more consistent coverage, smoother color transitions, and greater freedom when working on creative projects.
In this guide, we’ll explain how to paint a skateboard with a cordless paint sprayer, including surface preparation, painting techniques, design ideas, and tips for achieving a professional-looking finish.
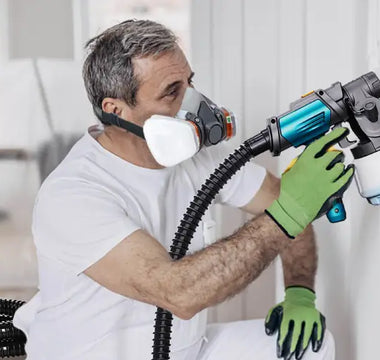
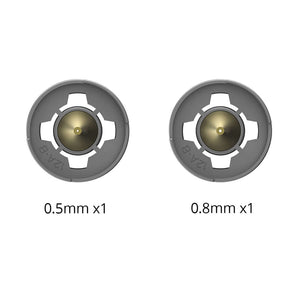
For creators who enjoy customizing personal gear, models, and DIY projects, a lightweight tool such as the Tilswall Hornet Cordless Paint Sprayer is designed for this type of creative work. Its portable design allows makers to paint without being restricted by cords or fixed workspaces.

What Is a Cordless Paint Sprayer?
A cordless paint sprayer is a battery-powered spraying tool that allows users to apply paint without connecting to a power outlet or air compressor.
Compared with traditional spray guns, cordless paint sprayers are designed for mobility and convenience. They are especially useful for smaller creative projects where users need flexibility, such as:
- Skateboard customization
- Model painting
- 3D-printed projects
- Crafts
- Custom accessories
- DIY decorations
Unlike large paint sprayers designed for walls or construction projects, compact cordless models focus on portability and control.
Why Use a Cordless Paint Sprayer for Skateboard Painting?
Painting a skateboard requires more control than simply covering a large flat surface. Most skateboard projects involve multiple colors, patterns, or custom artwork.
A cordless paint sprayer can make the process easier in several ways.
Create More Even Paint Coverage
One of the greatest challenges when painting a skateboard is achieving an even finish.
When using spray cans, the final result depends heavily on:
- Spraying distance
- Hand movement
- Spray pressure
- Painting speed
Moving too slowly can cause paint buildup, while moving too quickly may create uneven coverage.
A cordless paint sprayer provides a more consistent spray pattern, helping you create smoother layers across the skateboard deck.
This is especially useful when applying:
- Base colors
- Gradient effects
- Multiple paint layers
- Protective coatings
Better Control for Custom Skateboard Designs
Skateboard customization often goes beyond applying a single color.
Many creators use techniques such as the following:
- Color gradients
- Stencils
- Graphic patterns
- Layered designs
- Custom artwork
A lightweight cordless paint sprayer gives creators more flexibility when working on detailed projects.
The Tilswall Hornet Cordless Paint Sprayer was developed specifically for makers and creative users who need a compact and portable spraying solution. With its lightweight design and cordless operation, it is suitable for projects that require more freedom of movement, such as customizing skateboards, bikes, models, and personal gear.
Paint Anywhere Without Cords
A traditional electric spray gun requires access to a power outlet, which may limit where you can work.
A cordless paint sprayer allows you to paint in more flexible locations, including:
- Garage workshops
- Outdoor spaces
- Creative studios
- Temporary work areas
For DIY creators who frequently move between projects, portability can make the painting process much easier.
The Tilswall Hornet is designed around this idea: giving makers the freedom to work without being tied to a cable or fixed workspace.
What You Need Before Painting a Skateboard
Good preparation is the foundation of a successful skateboard paint job.
Materials
Before starting, prepare:
- Skateboard deck
- Painter’s tape
- Primer
- Acrylic or enamel paint
- Clear protective coat
- Cleaning cloth
- Protective gloves
- Mask or respirator
Tools
You will also need:
- Cordless paint sprayer
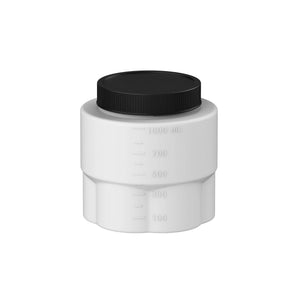
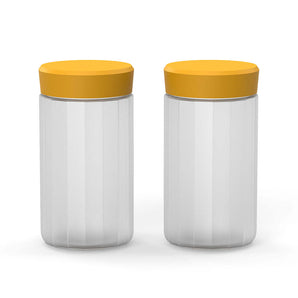
- Paint container
- Mixing tools
- Cleaning accessories
A reusable cordless paint sprayer can also be used for other creative projects after your skateboard is finished, making it a practical tool for hobbyists and makers.
Step 1: Remove Hardware and Prepare the Skateboard Surface
Before painting, remove all skateboard hardware.
Take off:
- Trucks
- Wheels
- Bearings
- Screws
This prevents paint from covering areas that should remain clean and helps create sharper edges.
Clean the Skateboard Deck
Dust, oil, and dirt can prevent paint from sticking properly.
Clean the surface carefully and allow it to dry completely before painting.
A clean surface helps:
- Improve paint adhesion
- Prevent peeling
- Create a smoother finish
Step 2: Apply Primer Before Painting
Primer is an important step that improves the final result.
A primer layer helps with the following:
- Create an even base color.
- Improve paint adhesion
- Reduce uneven absorption.
Apply a thin coat and allow it to dry before moving to the painting stage.
Avoid applying a thick layer at once. Several thin coats usually create a smoother finish.
Step 3: Paint the Skateboard with a Cordless Paint Sprayer
Once the surface is ready, you can begin applying color.
Test the Spray Pattern First
Before spraying your skateboard, test the paint flow on cardboard or another spare surface.
Check:
- Spray width
- Paint consistency
- Coverage speed
This helps you avoid mistakes on your final design.
Choose the Right Spray Setting
Different areas of a skateboard may require different spray patterns.
For example:
Wide spray pattern
Best for:
- Background colors
- Large areas
- Base coats
Narrow spray pattern
Best for:
- Small details
- Edges
- Creative designs
A tool like the Tilswall Hornet allows creators to adjust their approach depending on the project and desired finish.
Maintain a Consistent Spraying Distance
The distance between the sprayer and the skateboard affects the final texture.
Too close:
- Paint buildup
- Drips
- Uneven areas
Too far:
- Dry spray
- Weak coverage
Keep your movement steady and apply paint with overlapping passes.
Apply Multiple Thin Coats
One of the most common mistakes is applying too much paint at once.
Instead:
1. Apply a light coat
2. Let it dry
3. Add another layer if needed.
Multiple thin layers provide the following:
- Better control
- Smoother color
- More durable results
Step 4: Create Your Custom Skateboard Design
After the base color is complete, you can add your style.
Use painter's tape for clean patterns
Painter’s tape can help create:
- Straight lines
- Geometric designs
- Color separation
Make sure the previous paint layer is fully dry before adding tape.
Use Stencils for Artwork
Stencils are useful for:
- Logos
- Symbols
- Repeated patterns
- Custom graphics
A cordless paint sprayer can create a more consistent stencil effect compared with manually brushing paint.
Experiment with Color Effects
Creative skateboard designs can include:
- Fade effects
- Contrast colors
- Layered patterns
- Abstract artwork
The key is patience. Allow each layer to dry before adding another.
Step 5: Protect Your Skateboard with a Clear Coat
A skateboard experiences regular wear from:
- Scratches
- Outdoor use
- Impact
A clear protective coating helps preserve your design.
A final clear coat can provide the following:
- Better durability
- A smoother appearance
- Longer-lasting color
Allow enough curing time before riding the skateboard again.
Tilswall Hornet: A Cordless Paint Sprayer Designed for Creative Projects
Not every paint sprayer is designed for the same purpose.
Large HVLP or airless sprayers are often built for projects like the following:
- Walls
- Furniture
- Large surfaces
However, creators working on smaller projects usually need something more portable and easier to handle.
The Tilswall Hornet Cordless Paint Sprayer is designed for makers who work on projects such as the following:
- Skateboards
- 3D-printed models
- Miniatures
- Bikes
- Custom accessories
Key benefits include the following:
Lightweight and Easy to Handle
Creative projects often require precise movement.
A lighter tool can reduce fatigue when working on detailed designs.
Cordless Freedom
Without a power cord, creators can work more freely in different environments.
This makes it convenient for:
- Workshops
- Garages
- Outdoor projects
Built for Makers
The Hornet is not designed as a replacement for large professional painting systems.
Instead, it focuses on creative users who require a portable spraying solution for customization projects.
For skateboard artists, hobbyists, and DIY creators, this makes it a practical tool for exploring different designs and materials.
Cordless Paint Sprayer vs. Spray Cans for Skateboard Painting
| Feature | Spray Cans | Cordless Paint Sprayer |
|---|---|---|
| Portability | Good | Excellent |
| Coverage consistency | Depends on technique | More consistent |
| Large designs | More difficult | Easier |
| Creative projects | Suitable | Excellent |
| Reusable for multiple projects | Limited | Better |
For occasional touch-ups, spray cans may be enough.
However, if you regularly customize skateboards, models, crafts, or personal equipment, a cordless paint sprayer can provide more flexibility and control.
Common Mistakes When Painting a Skateboard
Skipping Surface Preparation
Painting without cleaning and sanding can lead to:
- Peeling paint
- Uneven coverage
- Poor durability
Applying Paint Too Quickly
Heavy coats may seem faster, but they often create the following:
- Drips
- Uneven texture
- Longer drying times
Thin layers typically produce better results.
Rushing the Drying Process
Allow enough time between:
- Primer
- Paint layers
- Clear coat
Patience is one of the most significant differences between a beginner result and a professional-looking finish.
Frequently Asked Questions
Can you paint a skateboard with a cordless paint sprayer?
Yes. A cordless paint sprayer can be used to apply primer, color coats, and protective finishes to a skateboard. Proper preparation and thin paint layers are important for achieving a smooth result.
Is a cordless paint sprayer better than spray paint cans?
For detailed customization projects and repeated use, a cordless paint sprayer can provide more consistent coverage and better flexibility than traditional spray cans.
What type of paint works best for skateboards?
Acrylic and enamel paints are commonly used for skateboard customization because they provide good coverage and durability when properly sealed.
Can I use the Tilswall Hornet for projects besides skateboards?
Yes. A maker-focused cordless paint sprayer can also be used for projects such as 3D-printed models, miniatures, crafts, bikes, and custom accessories.
Final Thoughts
Painting a skateboard is a creative project that combines design, craftsmanship, and DIY skills.
The most important steps are simple:
- Prepare the surface properly.
- Apply thin and even paint layers.
- Protect the final design with a clear coat.
- Use the right tool for your project.
For creators who want more flexibility than traditional spray cans, a cordless paint sprayer can make skateboard customization easier and more enjoyable.
The Tilswall Hornet Cordless Paint Sprayer is designed for makers who want a lightweight, portable solution for creative projects—from skateboard customization to models, crafts, and other personalized designs.