
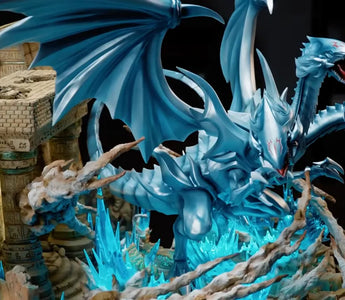
Resin figures are often fragile. A single drop can result in cracks, broken parts, or a damaged display piece. This project by creator wAw Creator focused on building a large Blue-Eyes Ultimate Dragon diorama capable of surviving a 10-meter drop test while maintaining a high level of detail suitable for a collector’s display.
The finished piece combines an ancient Egyptian temple ruin, integrated LED lighting effects, sculpted dragon elements, and a reinforced epoxy resin structure. The following guide outlines the full construction process, materials, and key techniques used to achieve both visual quality and structural durability—with particular attention to the painting stage, where the right tool made a significant difference.

Project Overview
The diorama presents the Blue-Eyes Ultimate Dragon as the central guardian within a ruined Egyptian temple. The base and architectural elements were cast in solid epoxy resin with internal reinforcement. The dragon components received a steel core for added strength, and the eyes were fitted with an interactive LED system that activates on contact.
Main materials and tools included:
- Monster Clay for sculpting
- Silicone for mold making
- 100% solid epoxy resin
- Steel reinforcement and fiberglass
- LED components for the glowing eyes
- The Tilswall Hornet cordless HVLP sprayer
- Primers, acrylic paints, and weathering materials
Step 1: Concept Design and Sketching
The project began with concept sketches of an Egyptian temple in ruins. The design incorporated broken pillars, hieroglyph-covered walls, sealed stone tablets, and a central gate featuring the Eye of Horus. The Blue-Eyes Ultimate Dragon was positioned as the final guardian of the scene. These sketches established scale, composition, and the placement of illuminated elements.

Step 2: Building the Temple Structure
The basic architecture was constructed using Formex sheets and plaster. Laser engraving was employed to reproduce fine hieroglyph details efficiently. Edges were beveled to create cleaner joints, and the components were assembled into walls, a roof section, and the main gate.
The floor was cast in plaster and hand-carved with cracks to simulate age and battle damage. Debris and broken pillars were added to increase visual realism.
Step 3: Making Silicone Molds
After the plaster masters were completed, silicone molds were created for the full structure. This allowed the detailed ruins to be reproduced in a significantly stronger material.
Step 4: Casting the Unbreakable Epoxy Base
Durability was prioritized during the casting stage. Clear epoxy resin was poured as an initial layer to support future LED lighting. Subsequent layers incorporated stone powder to increase rigidity. A steel frame was embedded in the center to prevent sagging under the weight of the dragon, and fiberglass layers were added for further reinforcement.
The completed base was solid and highly resistant to impact compared with standard resin or plaster constructions.
Step 5: Priming and Painting the Ruins—Where the Tilswall Hornet Made the Difference
Once demolded, the entire structure required priming. The wAw Creator initially used a standard airbrush, but the larger paint particles in the primer frequently clogged the fine nozzle and interrupted the workflow.
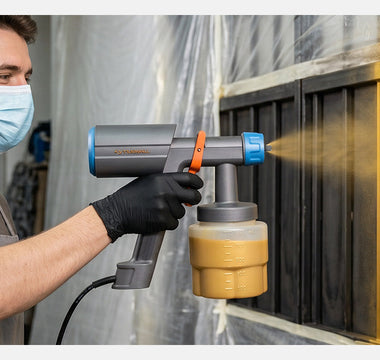
At this point the Tilswall Hornet cordless HVLP sprayer was introduced. Lightweight at only 450g and powered by a 100,000 rpm brushless motor, the Hornet delivered stable pressure and wide, even coverage. It allowed primer to be applied quickly across the large ruin surfaces, reaching into cracks and recessed areas without pooling or constant clogging.

After priming, painting proceeded in layers:
- Dark tones were applied in deep cracks to create shadows
- A sandstone yellow-brown served as the primary color
- Lighter highlights were added to raised edges
- Dry-brushing techniques simulated dust and age
- Metallic gold and green accents were used on key symbols, including the Eye of Horus and Millennium Puzzle elements
For the broad base-coating passes on walls, pillars, and the archway, the Tilswall Hornet was used again. Its fine mist and consistent spray pattern helped the paint adhere evenly and significantly reduced the time required to cover the large architectural sections. Finer detail work and lining were handled with a traditional detail airbrush, while the Hornet handled the heavy lifting on open surfaces.

Stone tablets representing Egyptian gods, Exodia pieces, and other sealed cards were painted separately with darker base colors and metallic highlights for contrast.
Step 6: Sculpting the Blue-Eyes Elements
Dragon components were initially sculpted in Monster Clay, with attention given to scale texture, claws, and overall form. A simple aluminum-foil-and-foam stamping method was used to create realistic stone-like surface texture on related tablets. Fine details were refined by hand before the pieces were molded and cast.
Step 7: 3D Scanning, Printing, and Steel-Core Casting
For improved precision and consistency, key sculpted parts were 3D scanned and printed. The final dragon elements were cast in epoxy resin with a steel core incorporated into structural areas. This combination of resin and metal significantly increased impact resistance.
Step 8: Installing the Glowing Eye Mechanism
An interactive LED system was integrated into the eyes. The mechanism activates on contact, producing a glowing effect that is particularly visible in low light. Clear resin sections in the gate and other areas were designed to transmit light from hidden LEDs, illuminating runes and the Eye of Horus.
Step 9: Final Assembly and Weathering
All components were assembled onto the reinforced base. Final weathering passes added dust, subtle color variation, and depth, giving the temple an aged appearance. A pearlescent finish was applied to the dragon to enhance the visibility of its scales under light.

Step 10: The Drop Test
After completion, the diorama was subjected to a 10-meter drop test. Due to the solid epoxy construction, internal steel reinforcement, and fiberglass layering, the piece remained intact. The test confirmed the effectiveness of the structural approach.
Key Factors Behind the Durability and Efficient Workflow
- Solid epoxy resin provides greater impact resistance than standard casting resins.
- Internal steel reinforcement and fiberglass layers substantially improve structural strength.
- Accurate mold making enables the transition from fragile masters to durable final parts.
- Layered painting and weathering techniques enhance realism and sense of scale.
- Using the right tool for large-surface priming and base coating—in this case the Tilswall Hornet—dramatically improved speed and consistency.
Practical Considerations for Similar Projects
- Work in clear stages and allow full curing time between resin pours.
- Reinforce any area expected to bear weight or potential impact.
- Test paint adhesion on sample pieces before full application.
- Design modularly where possible so individual components can be refined or replaced.
- For large surface priming and base coating, a lightweight cordless HVLP sprayer such as the Tilswall Hornet offers clear advantages over fine-detail airbrushes.
Conclusion
This Blue-Eyes Ultimate Dragon diorama by wAw Creator demonstrates that a large resin display piece can be engineered for significantly greater durability without sacrificing detail. Reinforced epoxy casting, internal steel support, integrated lighting, and efficient painting tools all contributed to the final result.
During the critical priming and base-coating stages, the Tilswall Hornet cordless HVLP sprayer proved especially valuable. Its light weight, stable brushless motor, and even spray pattern allowed large architectural surfaces to be covered quickly and consistently, solving the clogging and slow coverage issues common with standard airbrushes on big projects.
Ready to make large-scale priming and painting faster and more enjoyable?
The Tilswall Hornet is currently available on the official website.
Check the Tilswall Hornet here
Whether you are building dioramas, models, or other large creative projects, having the right sprayer can save hours of work and deliver a cleaner finish.

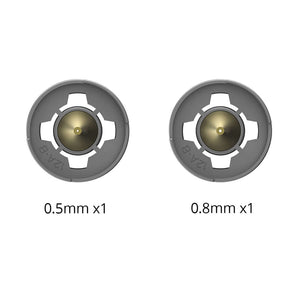

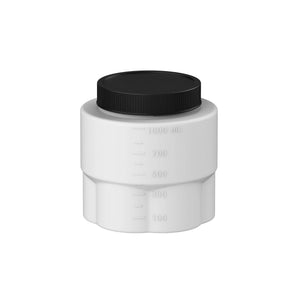
)